DIY patches offer a creative, budget-friendly way to breathe new life into worn clothes. From a faded elbow on a jacket to torn pockets on jeans, patches for clothing can transform pieces into fresh, personalized items. Whether you prefer sew-on methods or DIY iron-on patches, this guide explains how to sew patches, the tools you’ll need, and practical placement ideas. You’ll discover how to sew patches for durability and style, making upcycling clothes with patches a simple, sustainable habit. You’ll see how quickly you can personalize old clothes with patches and tell your wardrobe story.
From another angle, these fabric embellishments can be described as garment embellishments, fabric appliqués, or textile repairs that refresh a closet with minimal waste. This approach fits within sustainable fashion, enabling wardrobe customization and personal storytelling without discarding beloved pieces. Whether you’re adding decorative patches, mending a seam with fabric appliques, or using heat-activated patches, the idea centers on creative expression and practical repair. Beginners can explore sew-on methods or heat-activated options, selecting shapes and colors that echo hobbies and memories. In short, think of these patches as a form of upcycling and textile art—simple, affordable ways to extend the life of clothes while updating your style.
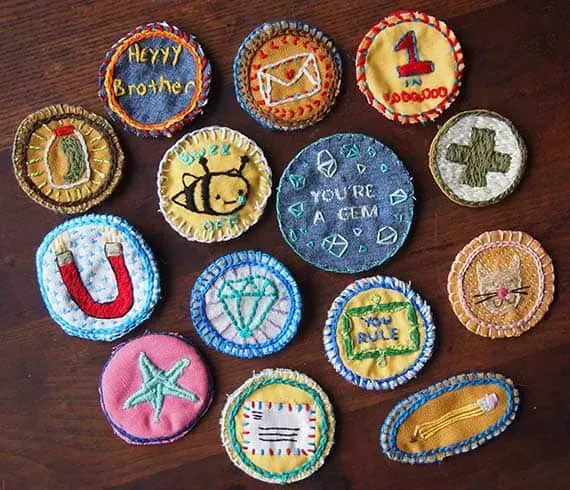
DIY patches for clothing: personalize old clothes with style
DIY patches offer a creative, budget-friendly way to refresh worn items while letting your personality show through. By choosing patches for clothing that reflect your interests—from retro logos to floral designs—you can transform a tired jacket, jeans, or tote bag into a unique canvas. This approach aligns with upcycling clothes with patches, extending the life of garments you already own rather than buying new pieces.
Using DIY patches is a forgiving entry into garment customization. They provide a visible, tangible way to personalize old clothes, whether you’re aiming for a bold statement or a subtle accent. The act of selecting patches, planning layouts, and applying them becomes a small, satisfying project that evolves with your wardrobe tastes and memories embedded in your clothing.
Choosing between sew-on and DIY iron-on patches: how to sew patches vs iron-on options
There are two main routes for applying patches: sew-on patches and DIY iron-on patches. Sew-on patches are durable and ideal for sturdy fabrics like denim and canvas, where a backstitch or neat edge finish can anchor the design for long-term wear. DIY iron-on patches offer a faster, mess-free option—great for beginners or quick refreshes—though they require attention to temperature and care in the first washes.
To maximize longevity, follow patch manufacturer instructions and consider reinforcing iron-on patches with a quick sewing around the edge. Conversely, sewing patches around the edges with a zigzag or satin stitch can deliver a robust finish that withstands repeated washing. Exploring both techniques expands your toolkit for how to sew patches and incorporates the convenience of DIY iron-on patches within your patching projects.
Step-by-step patching: applying patches on denim, canvas, and fabrics
A practical approach to applying patches starts with planning your layout. Lay the garment flat, arrange a mix of sew-on and iron-on patches, and consider color balance, patch size, and garment features like elbows and pockets. This planning stage helps ensure patches for clothing blend with the fabric and create a cohesive look.
Next, prepare the fabric by cleaning and drying it, then apply patches according to their type. For DIY iron-on patches, press with a hot iron on a clean, flat surface, using parchment paper as a shield and allowing the patch to cool before testing. For sew-on patches, stitch carefully around the edges with a backstitch or small running stitch to secure durability. This step-by-step workflow illustrates how to sew patches effectively and how to use iron-on patches for faster results.
Creative patch placement ideas to maximize impact on jackets, jeans, and bags
Consider placement that aligns with garment features and movement. Elbows on jackets and knees on jeans endure the most wear, making them excellent spots for durable patches. Pockets and seams offer opportunities for both decorative flair and reinforcement, while hems and collar edges can add subtle details that elevate the overall look.
A mixed-media collage approach can tell a story or showcase a color theme by combining several small patches. Whether you’re upcycling clothes with patches or simply personalizing a tote bag, experimentation with layout can transform everyday pieces into bold, fashion-forward statements. This exploration of patch placement emphasizes how thoughtful design choices amplify the impact of patches for clothing.
Care and maintenance for patched garments to ensure longevity
Patched garments require mindful washing to preserve adhesion and stitching. Turn items inside out before washing and opt for a gentle cycle with cold water to protect both the fabric and the patches for clothing. Avoid harsh detergents and high heat, which can weaken adhesives and threads over time.
If you notice edge peeling, a quick touch-up with fabric glue, a needle-and-thread repair, or a new stitch around the patch can extend the life of your DIY patches. With proper care, patched items can remain stylish and wearable for years, ensuring your patches continue to complement your personal style and the upcycled aesthetic you’ve created.
Upcycling clothes with patches: transform worn pieces into personalized fashion statements
Upcycling clothes with patches is about breathing new life into familiar pieces. By selecting patches that reflect your interests and experiences, you turn a tired item into a personalized wardrobe highlight. This approach aligns with sustainable fashion goals, reducing waste while preserving items with sentimental value.
Project ideas abound: from elbow patches on a denim jacket to collage-like patches on a tote bag, patches give you room to personalize old clothes and tell your story. As you expand your patch collection and try different textures and embroidery around the edges, you’ll discover how simple patches can transform ordinary garments into distinctive, long-lasting pieces that celebrate your style.
Frequently Asked Questions
How can DIY patches help personalize old clothes and refresh a tired wardrobe?
DIY patches let you transform worn items into new, unique pieces without buying new clothes. Start by selecting patches for clothing that match your style, plan a layout, and sew or iron them on to personalize old clothes with color, texture, and meaning.
What’s the difference between patches for clothing and the two main methods—sew-on patches and DIY iron-on patches?
Patches for clothing come in sew-on and iron-on styles. Sew-on patches are durable on sturdy fabrics, while DIY iron-on patches offer a quick, mess-free option but may require extra stitching for longevity.
How to sew patches and apply them correctly on fabric, and when to choose DIY iron-on patches?
For sewing patches, prep the fabric, plan the layout, and use a backstitch around the patch edge. If you’re using DIY iron-on patches, follow the manufacturer’s heat settings with a protective cloth and let the fabric cool to set; for extra security, sew around the edge with a zigzag stitch.
Which tools are essential for upcycling clothes with patches and applying patches for clothing?
Essential tools include a mix of patches for clothing (sew-on and iron-on), sharp fabric scissors, a needle and thread, an iron and ironing board, a seam ripper, and optional fabric glue. These basics cover most DIY patches projects and help you upcycle clothes with patches effectively.
Where should patches for clothing be placed on a denim jacket or tote bag for maximum impact?
Place patches where they won’t rub seams or stretch, with elbows, knees, pockets, hems, and shoulder areas as common targets. Test layouts first and consider color balance to create a cohesive, balanced look.
What common mistakes should beginners avoid when using DIY patches to personalize old clothes?
Avoid oversize patches, skipping fabric prep or stabilization, and neglecting layout planning. Rushing the ironing can cause edges to lift; test adhesion on a hidden area and reinforce with stitches if durability matters.
| Aspect | Key Points |
|---|---|
| What DIY patches are | A creative, budget-friendly way to refresh worn clothes; emphasizes upcycling and personal expression. |
| Patch types | Sew-on patches (durable on sturdy fabrics) vs. DIY iron-on patches (quick, beginner-friendly). Instructions emphasize following manufacturer guidelines and ensuring clean surfaces. |
| Tools & materials | Patches (mix of sew-on and iron-on), fabric scissors, needle & thread, fabric glue optional, iron & ironing board, seam ripper, protective cloth for ironing. |
| How to apply patches | Plan layout; prepare fabric; apply iron-on or sew-on patches; finish with trimming and optional embroidery. |
| Project ideas | Denim jacket elbows, jeans knees, tote bag accents, chambray shirt patches, sneakers patches. |
| Placement ideas | Elbows/knees; pockets/seams; hems/collar edges; mixed-media collage. |
| Care & maintenance | Turn garments inside out for washing; gentle cycle; cold water; avoid high heat; repair loose edges as needed. |
| Common mistakes | Using patches too large; skipping prep; poor layout; rushing ironing leading to lift. |
| Beginner workflow | Choose patches, plan layout, wash garment, apply patches, sew or secure, check edges, wear with confidence. |
| Value & conclusion | DIY patches make garment customization sustainable and personally expressive. |
Summary
DIY patches are an approachable doorway into garment customization, inviting you to breathe new life into old pieces and express your style through patches. Whether you choose sew-on or iron-on methods, this craft blends creativity with practicality, letting you extend the life of jackets, jeans, bags, and more. With careful planning, the right patches, and a little patience, you can build a wardrobe that is uniquely yours, reflects your memories and interests, and supports sustainable fashion.