
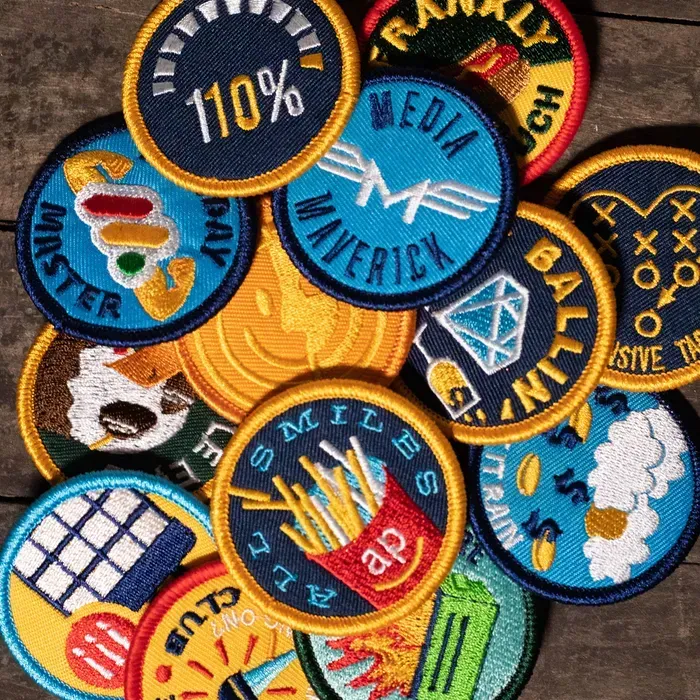
Custom patches open up endless ways to personalize clothing, gear, and bags, turning everyday items into recognizable style statements. Whether you’re a hobbyist adding flair to a jacket or a small business crafting a line of patches, patch making puts creative control in your hands. A durable patch begins with smart design decisions, the right backing, and a thoughtful edge finish to withstand daily wear. From choosing the right fabric to selecting embroidery or weaving techniques, this guide walks you through a repeatable process that saves time and money. This approach helps ensure your Custom patches look professional and endure routine washing.
Beyond the typical labels, these fabric embellishments function as wearable emblems that convey identity and purpose. Think of them as badge-like adornments created through a mix of design decisions, material choices, and precise stitching – an approach that aligns with emblem and badge creation in apparel. When planning, focus on silhouette, color harmony, and legibility to ensure the mark reads well at a glance and holds up to washing. For makers scaling from single pieces to larger runs, pragmatic guidance on backing, edging, and testing durability – often summarized as patch production tips – helps maintain consistency. This broader view shows how decorative patches, clothing insignias, and embroidered emblems share a common goal: elevate items with a personal or brand signature.
Getting Started with Custom Patches: Design, Materials, and Planning
Custom patches offer a powerful way to personalize apparel, gear, or bags while keeping a professional, durable look. This is where patch making begins: with a clear concept, a suitable fabric base, and the backing that will support your embroidery or weaving. When planning materials, consider the end use of the patch—denim, canvas, nylon, fleece, or leather—and how it will be applied. A well-thought-out plan helps ensure edge finishing, color vibrancy, and stitching density translate well from concept to final product.
To succeed in this process, outline your patch design ideas early and map them to practical constraints like size, silhouette, color separation, and backing compatibility. The goal is a repeatable workflow that fits your budget and timeline. Throughout, apply patch production tips such as selecting stabilizers, choosing a Merrow or laser-cut edge, and deciding between iron-on or sew-on backings so your patches perform as intended in real-world wear.
Choosing the Right Backing and Edge Finishing for Durability
Backings determine how patches are attached and how long they last after washing or heavy use. Iron-on backing offers quick application, but durability can vary with heat and repeated laundering. Sew-on backing provides long-term security, especially for workwear or athletic gear, but requires stitching. Selecting the best backing is a foundational decision in patch production and directly affects the user experience.
Edge finishing also shapes durability and aesthetic. A Merrow edge delivers a clean, classic finish and can withstand frequent handling, while a laser-cut edge creates a precise silhouette with a modern look. Both options influence the patch’s feel, cost, and suitability for different fabrics. By aligning backing choice with edge finishing, you ensure your patches hold up to washing, abrasion, and daily wear.
Designing for Embroidery: Colors, Shapes, and Stitch Strategies
When designing for embroidery and embroidered patches, prioritize strong silhouettes and color contrast so the design reads clearly from a distance. Patch design ideas often leverage bold shapes, simple lines, and a restrained color palette to maximize legibility and minimize stitching density. A well-chosen shape—round, shield, badge, or a clean custom silhouette—facilitates efficient stitching and crisp edges.
Color strategy is crucial in patch making. Limit your palette to a few core colors and plan for color stops and underlay stitches to avoid fabric show-through. Decide on satin stitches for borders and fill stitches for larger areas, or explore woven patches for a different texture. These choices directly influence how to create patches that look vibrant and durable across different materials.
From Concept to Cut: The Step-by-Step Patch Creation Process
This section walks through a typical embroidered patch workflow, translating a concept into a finished product. Start by finalizing the design and size, then digitize the artwork to create embroidery-ready stitches. Providing clean vector assets or high-resolution art helps streamline the digitizing process and reduces revision cycles in patch production.
Next, choose backing and edge finish, prepare a sturdy patch blank, and hooped fabric accurately. Run the embroidery with attention to stitch density and underlay, then remove stabilizers and apply the chosen edge. After cutting the patch from the base material, attach the backing and conduct a quality check to confirm color consistency and durability before packaging or sale.
Exploring Woven and Printed Alternatives to Embroidered Patches
If embroidery isn’t the right fit, woven patches offer a high-detail alternative with a tighter weave and thinner borders. Woven patches can deliver sharp imagery with a different texture profile, often appealing for logos with clean lines and small text. This option expands your patch making toolkit by providing a durable, comfortable option for various fabrics.
Printed patches, using heat-transfer or dye-sublimation, enable complex imagery and gradients that are challenging to achieve with embroidery. They’re ideal for photographs or highly detailed artwork, and can be more cost-effective for large runs. When choosing between embroidered patches, woven patches, or printed patches, weigh your budget, desired texture, and the level of detail required to meet project goals.
Scaling Patch Production: From One-Offs to Batches with Consistent Quality
As your projects grow, establish a repeatable process to scale from single patches to small or large batches. Start with a core set of designs and create standardized templates for size, backing, edge finish, and colorways. Consistency in layout, fabric, and stitching ensures a uniform look across all patches, helping you build a recognizable brand or portfolio.
A robust workflow includes digitization libraries, a reliable supply chain for blanks and stabilizers, and clear quality checks. Document your patch production tips—from testing colorfast threads to validating heat-press temperatures—so teammates can reproduce results. With careful planning, you can deliver high-quality patches efficiently while maintaining control over costs and timelines.
Frequently Asked Questions
How does patch making influence durability and material choices for custom patches?
Patch making decisions about materials, backing, stabilizers, and edge finishing directly impact durability. For example, choose a sturdy backing and Merrow edge for rugged wear on denim, and use an appropriate stabilizer to prevent embroidery distortion on lighter fabrics. Also decide between iron-on or sew-on backing based on how the patch will be applied and laundered.
What are embroidered patches, and when should I choose embroidery for custom patches?
Embroidered patches use stitched threads to build the design, offering durability and a rich texture. They work well for logos with bold shapes and strong contrast on jackets, bags, and gear. If you need photo-like detail or subtler textures, consider woven or printed patches.
Can you share some patch design ideas for custom patches?
Patch design ideas for custom patches include simple silhouettes, circular or shield shapes, a limited color palette (3–6 colors), and strong contrast for legibility from a distance. Ensure the design scales well and translates across materials like felt, twill, or woven bases. Use clean vectors and plan edge finishing early for a cohesive look.
How to create patches for custom patches: a step-by-step overview from design to finishing?
From concept to finished product: finalize design and size; digitize the artwork; choose backing and edge finish; prepare the patch blank with stabilizer; hoop and align; run embroidery; remove stabilizer; apply edge finishing; cut the patch; attach backing; perform a final quality check.
What patch production tips help scale from one-off patches to batches?
Patch production tips include standardizing sizes, using repeatable digitizing templates, testing colorways and thread choices, selecting durable stabilizers, and implementing strict quality control and consistent edge finishing to maintain uniform results across batches.
What backing options should I consider for iron-on vs sew-on patches in custom patches?
Backing options affect application and durability: iron-on backing is convenient for quick customization, while sew-on backing offers durability for frequent laundering. Consider offering patches with both backings or combos, and ensure heat settings are appropriate to avoid glue failure or fabric damage.
| Aspect | Key Points | Notes/Examples |
|---|---|---|
| What are Custom patches? | Personalize apparel, gear, or bags; durable patches; can be sewn or ironed; serve as recognizable brand signals or unique statements; final look is controllable. | Patch concept: design becomes a durable patch; planning about materials, technique, and finishing are key. |
| Purpose of this guide | Step-by-step from design to final application; explains patch making, embroidered patches, patch design ideas, how to create patches, and patch production tips; emphasizes the focus keywords Custom patches and related terms. | Outcome: professional-looking patches that withstand daily wear. |
| Materials and planning | Backing options (khaki cloth or stabilizer for embroidery, iron-on backing, or sew-on backing); stabilizer (tear-away or cut-away); fabric bases (felt, twill, or woven); embroidery thread (polyester or rayon); edge finishing (Merrowed edge or laser-cut with laser-fused finishing); cutting tools (scissors or rotary cutter); transfer/digitizing tools; backing hardware. | Choose materials based on fabric and application; aim for durable, vibrant results. |
| Design and preparation | Patch shape options (circle, shield, badge, custom silhouettes); color palette (3–6 core colors); patch size (2–4 inches); embroidery vs weaving style; clean vector or high-resolution design files (SVG, AI, EPS) or raster at 300 dpi or higher; consider professional digitizing if needed. | Ensure readability from distance; scalable design; digitizing can be outsourced if desired. |
| Step-by-step patch creation process (embroidered patch) | Finalize design and size; digitize; choose backing and edge finish; prepare patch blank; hoop and align; run embroidery; remove stabilizer; edge finishing; cut patch; attach backing; quality check; packaging and labeling. | This is a typical embroidered patch workflow from concept to finished product. |
| Alternative methods | Woven patches offer a crisper look with tighter weave; printed patches rely on heat-transfer or dye-sublimation for complex imagery; each method has trade-offs in texture, detail, durability, and cost. | Consider budget and design needs when choosing between embroidered, woven, or printed patches. |
| Backing types | Iron-on backing uses heat-activated adhesive for quick application; may wear off with repeated washing; sew-on backing requires stitching and is typically more durable; many patches offer both backings for versatility. | Choose backing based on use-case and laundering needs; durability often favors sew-on or dual-back options. |
| Care & maintenance | Gentle hand-washing or machine washing on a gentle cycle with cold water; air dry; avoid high heat; color and embroidery brightness can be preserved with proper care; stronger backing and stitch density help on outdoor gear. | Proper care extends patch life and maintains appearance. |
| Common mistakes & fixes | Distorted designs from poor stabilizers/hooping; frayed edges after trimming; color bleed or mismatch; backing failure; fixes include correct stabilizers, tighter edge, colorfast threads, and testing patches before production. | Test patches and adjust processes to prevent common issues. |
| Applications & scaling | Patches apply to fashion, gear customization, branding, clubs, teams, events; for business, start with a core set of designs, gather feedback, and iterate on patch size, backing options, and pricing; scale from one-off to a catalog of offerings. | A structured path from single patches to a full patch catalog. |
Summary
Custom patches open a versatile path to personal expression and brand visibility across apparel, gear, and bags. By understanding materials, backing options, and a repeatable patch-making workflow—from design through finishing—creators can produce durable patches that endure daily wear. Whether you’re making embroidered patches, woven patches, or printed patches, attention to edge finishing, stitch density, and backing ensures professional results. This guide highlights a practical approach to patch design, production, and scaling—from a single prototype to small or larger batches—while keeping costs and timelines realistic. Embrace Custom patches as a tool for consistent branding, creative expression, and valuable merchandise.